In this article, I’d like to share my experience growing Tiny Tim cherry tomatoes in a DIY Deep Water Culture (DWC) hydroponic system built entirely from materials I had on hand.
System Setup & Initial Parameters
The DWC Hardware
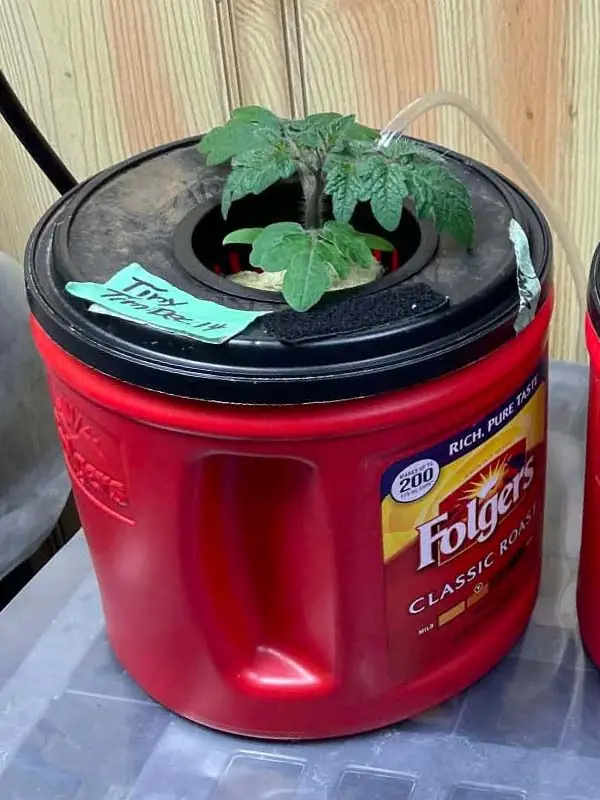
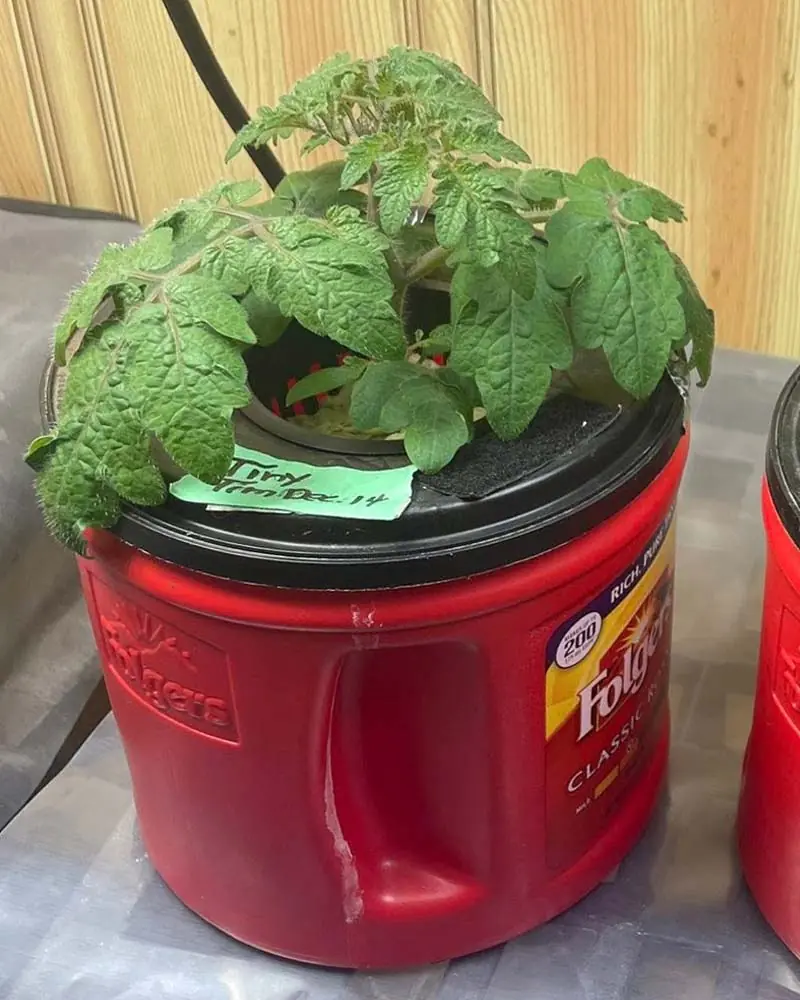
To house the Tiny Tim, I upcycled an empty 1-gallon coffee container. Because Tiny Tim is a genetic micro-dwarf variety, this compact footprint provided more than enough room for its root mass.
Using a hole saw, I drilled a 3-inch opening into the lid and inserted a standard net pot packed with rockwool. For aeration, I placed an air stone at the bottom of the tank connected to an aquarium air pump. Running the compressor on a timer kept the water thoroughly saturated with oxygen—a critical factor for supporting plants through a full fruiting cycle.
For lighting, I used a 100W Viparspectra LED panel. Because this light was shared with neighboring plants in my indoor setup, the tomato effectively received about half of the total light output. I set the timer to a stable photoperiod of 15 hours on and 9 hours off.
Finally, I set up a small oscillating fan on a timer to keep air moving across the canopy, which is essential for strengthening the stems and preventing stagnant moisture spots on the foliage.
Target Baseline Water Metrics
I filled the reservoir with municipal tap water and let it sit open for 24 hours to dissipate any residual chlorine. My initial baseline testing showed a pH of 7.8, which I lowered to an optimal 5.9 using General Hydroponics pH-Down.
My starting Electrical Conductivity (EC) was 0.4 mS/cm. After mixing in a vegetative dose of Masterblend 4-18-38 Tomato Formula, the total EC rose to a comfortable 1.5 mS/cm.
Read also: Finding the Best Hydroponic Grow Media for Your System
The Growth Log
Phase 1: Seedling & Early Vegetative Stage
I pre-moistened a small block of rockwool with the nutrient solution, dropped two seeds into a small indentation, and nestled the block into the net pot so the very bottom of the cube kissed the water line.
- Day 7: The first sprout broke through the surface.
- Day 10: The seedling stood completely upright (the second seed did not germinate).
- Day 20: The plant had developed more than three sets of true leaves. With the roots aggressively dropping down into the reservoir, I bumped the nutrient concentration up to 2.0 mS/cm.
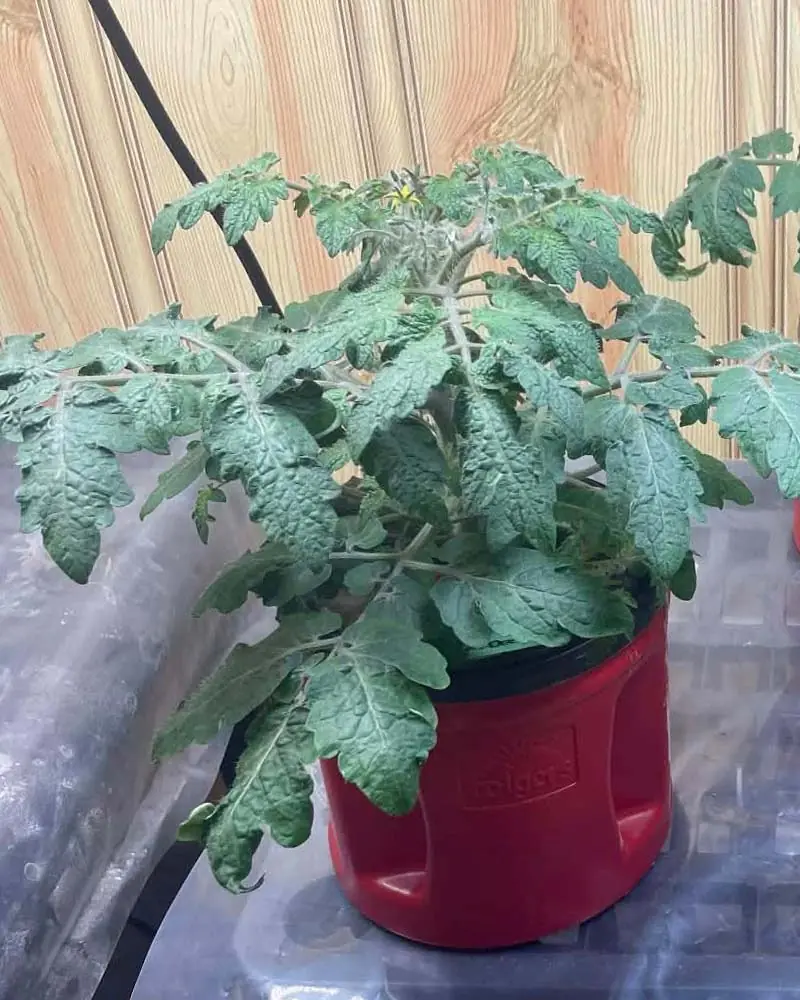
Phase 2: Explosive Growth & Nutrient Ramping
Following that second nutrient application, vegetative growth exploded. The Tiny Tim more than doubled in size in a single week.
As the foliage expanded, water consumption skyrocketed. The small 1-gallon reservoir meant I had to check the bucket daily to monitor the rapidly dropping water levels.
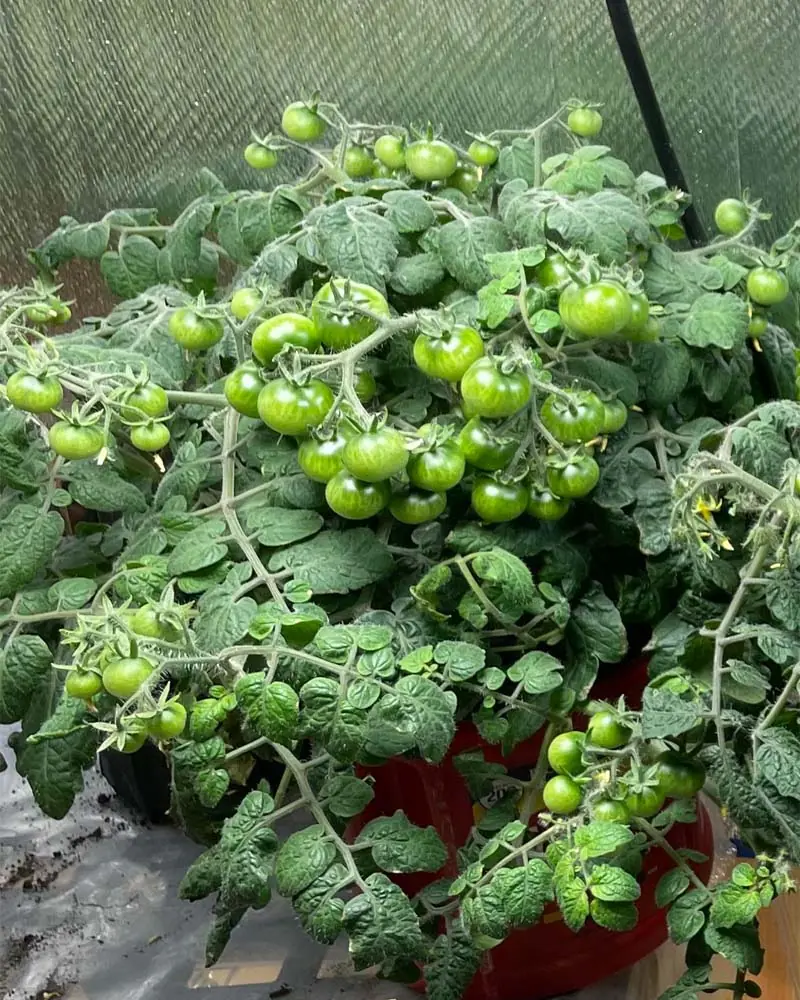
Phase 3: Flowering, Pollination, and Fruit Set
On Day 35, the first flower clusters (inflorescences) appeared, and the first blossoms opened just four days later.
Because this was an indoor grow, hand-pollination was required. The ambient airflow from the fan handled most of the heavy lifting, but I also manually agitated the flowers with a cotton swab to guarantee a high pollination success rate.
During peak bloom, I added a dedicated Cal-Mag supplement to safeguard against Blossom End Rot (BER) and improve overall fruit quality. By Day 48, the first tiny green tomatoes emerged. To support the heavy fruit load, I gave the reservoir a final nutrient push, bringing the EC to its peak at 2.5 mS/cm.
Read also: Hydroponic Mistakes That Cost Me My Harvest

Nutrient and Water Management
Throughout the lifecycle, I monitored the pH and EC almost daily. Instead of performing full reservoir changes, I chose to manage the system entirely via top-offs.
DWC Tip: When refilling a micro-reservoir, only fill it to about 3/4 of its total capacity. Leaving a 25% air gap at the top creates a dedicated “splash zone” that allows the upper air roots to breathe, preventing accidental drowning.
Whenever the EC dipped significantly due to plant consumption, I topped it off with a fresh nutrient allocation to maintain a stable baseline of 2.0–2.5 mS/cm.
Read also: Upgrading the Click & Grow Smart Garden 9 for Maximum Yields
Lessons Learned & Challenges
Remarkably, this run went smoothly from seed to harvest. Thanks to continuous aeration and strong air circulation, the root zone stayed bright white and free of root rot (Pythium), requiring absolutely no root or canopy pruning beyond removing older, yellowing lower leaves.
The only real drawback was the reservoir volume. A 1-gallon bucket dries out incredibly fast under a heavy fruit load, requiring relentless maintenance. For my next micro-dwarf run, I plan to scale up to a 3- or 4-gallon tote to create a much more forgiving buffer zone.
Read also: Top 5 High-Margin Hydroponic Crops for 2026
Final Yield
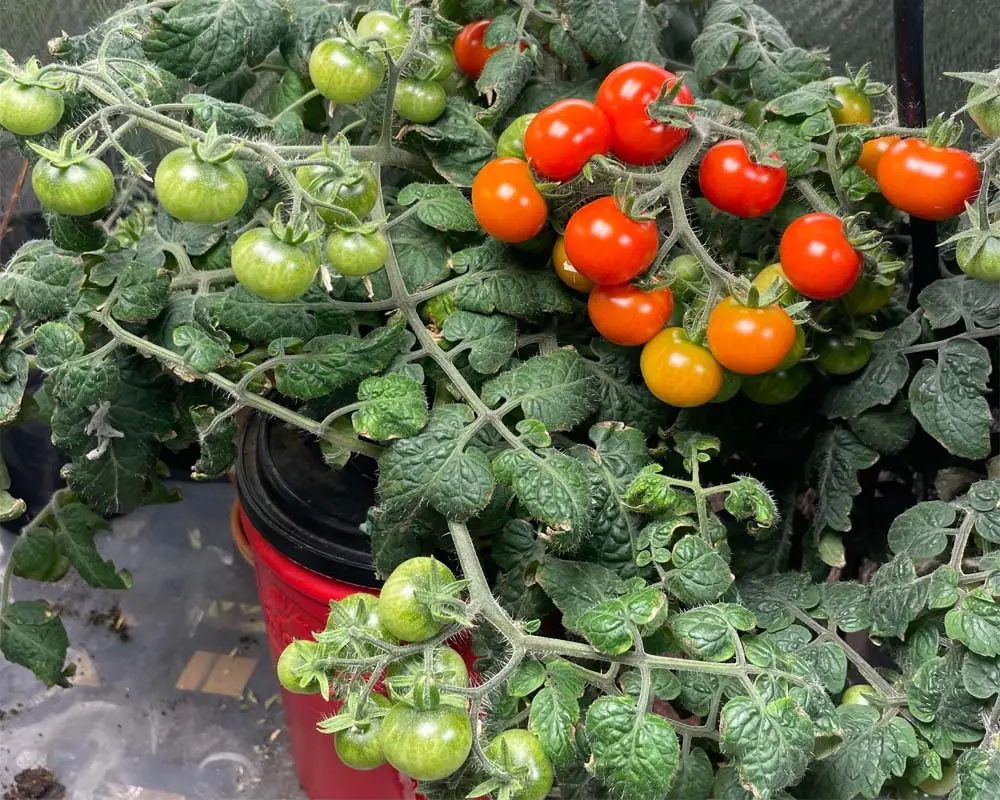
On Day 83, the first wave of cherry tomatoes turned a deep, uniform red. Over the following two weeks, the remaining clusters ripened sequentially for a staggered, continuous harvest.
- Total Weight: 1.3 pounds (approx. 590 grams)
- Total Yield: ~50 cherry tomatoes
Costs vs. Results
|
Item |
Quantity |
Cost |
|---|---|---|
|
Electricity |
71 kWh total (LED panel, air pump, fan) |
$12.11 |
|
Nutrients |
3.17 oz total (Masterblend kit + Cal-Mag) |
$1.35 |
|
Water & Additives |
Tap water, pH-Down |
$1.00 |
|
Total Cost |
$14.46 |
At a total cost of $14.46 for 1.3 pounds of fresh produce, the final cost breaks down to $11.12 per pound.
💬 What Do You Think? Would you try a micro-DWC setup like this on your countertop? Let me know in the comments below!
Share This Post