I continue to experiment with growing various plants using different hydroponic systems. This time, I decided to test out curly parsley in the smallest hydroponic system in the AeroGarden lineup: the AeroGarden Harvest.
The Setup Phase
I chose the AeroGarden Harvest for this experiment because it’s a compact system, meaning larger plants wouldn’t be able to reach their full potential here. Specifically, I went with curly parsley because it stays quite compact and remains highly fragrant. I purchased the seeds online from a popular gardening site.
Water
To start, I filled the reservoir with tap water and let it sit for 24 hours to dechlorinate. After that, I measured the initial pH with my Aqua Master P50 Pro pH meter. The reading was a bit too high, so I used General Hydroponics pH-Down to lower it to an optimal 5.9.
Fertilizer
Next, I added 3 milliliters of General Hydroponics FloraSeries fertilizer from each of the three bottles (Gro, Bloom, and Micro). After mixing, my Aqua Master E60 Pro read an EC of 1.2 mS/cm.
Seeds
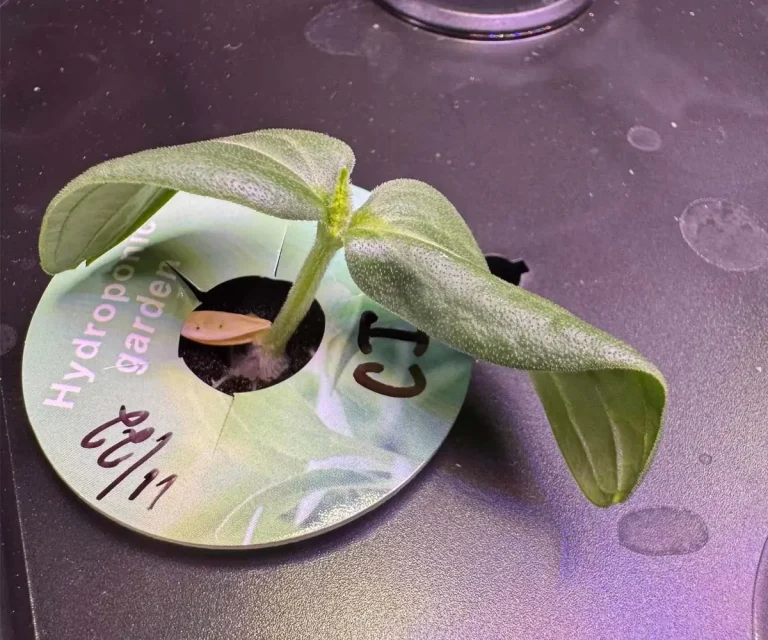
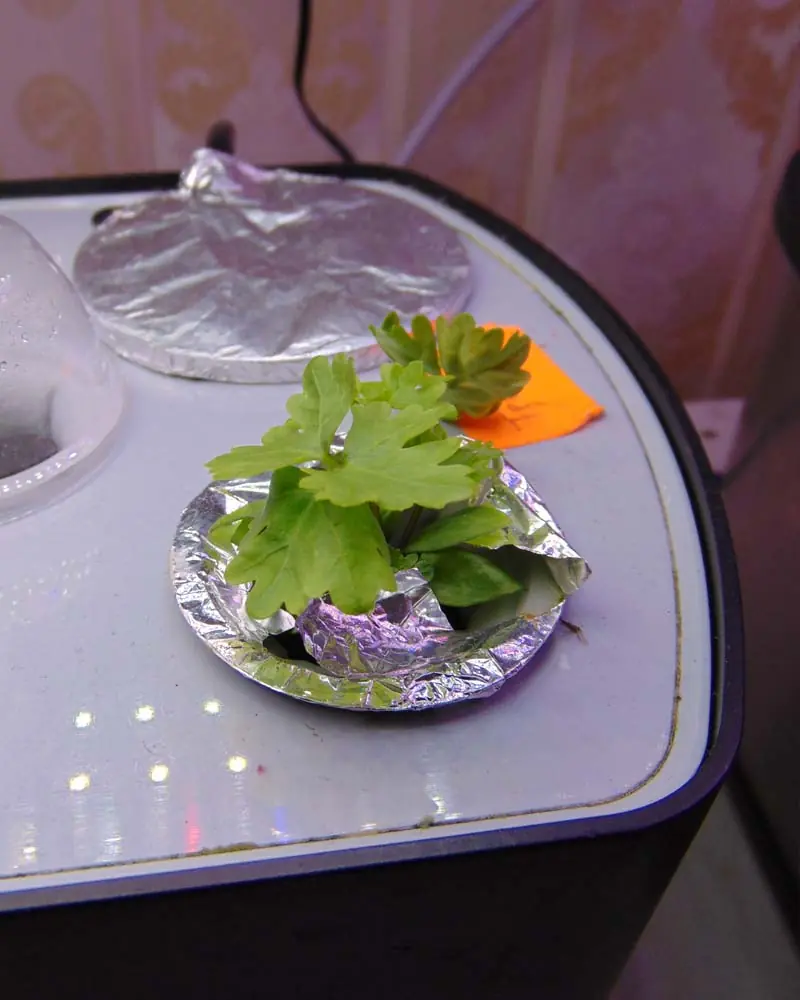
For the planting, I placed three seeds into each of the four growing sponges and set them into the net pots. To prevent algae growth on top of the sponges, I added a layer of aluminum foil with small slits cut out for the sprouts, then covered them with the standard grow domes.
Light
My final step was starting the system. The Harvest comes with a built-in light schedule of 15 hours on and 9 hours off, which is perfect for parsley. I adjusted the LED light panel to its lowest position to give the seeds maximum light intensity once they sprouted.
Pro Tip: I also dropped an air stone into the reservoir connected to an external aquarium air pump to supplement aeration. I set the pump on a timer to run for 15 minutes every hour.
Read more: Water Management In Small Indoor Hydroponics
Growth Timeline
Germination (Days 1–17)
On the eleventh day, the seeds in the first pot finally sprouted, and I promptly removed their transparent grow dome. Six days later (Day 17), the first true leaves appeared. In total, three healthy plants sprouted in this single pot.
Unfortunately, the seeds in the other three pots failed to germinate. I had to replace them with new sponges and fresh seeds. This second batch ended up sprouting about 20 days later than the first, creating a bit of a staggered growth cycle.
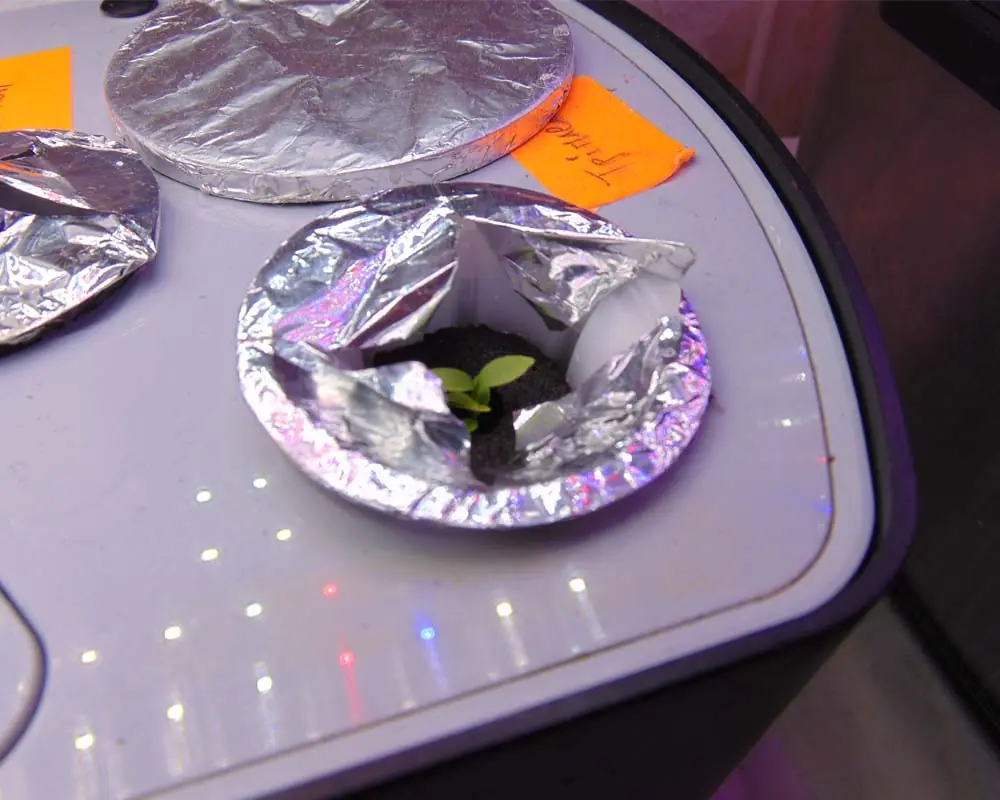
The Establishment Phase (Day 23)
Once the parsley sprouted, I decided not to thin it out. I left all the sprouted seedlings in the pot to achieve maximum bush density and make the most efficient use of the footprint and light grid.
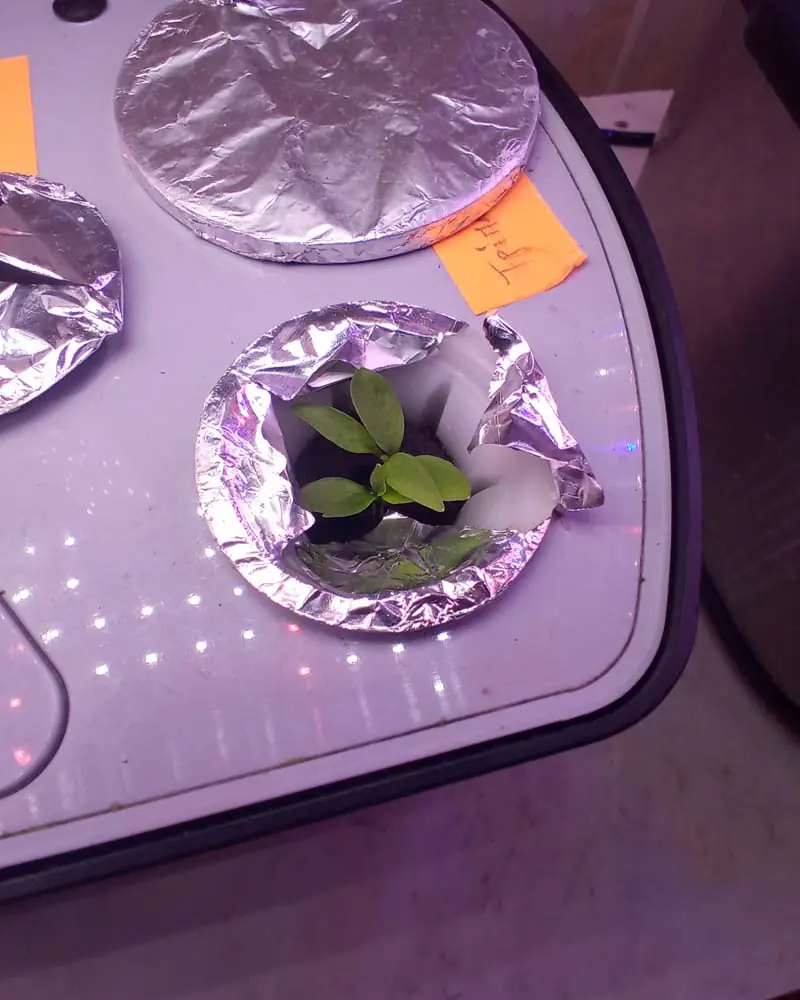
By Day 21, the first pot was showing robust leaf development. At this stage, I added a second dose of fertilizer (7.5 milliliters total), bringing the EC back up to 1.2 mS/cm. I also raised the LED panel slightly to prevent any leaf burn on the new growth.
The Growth Explosion (Day 35)
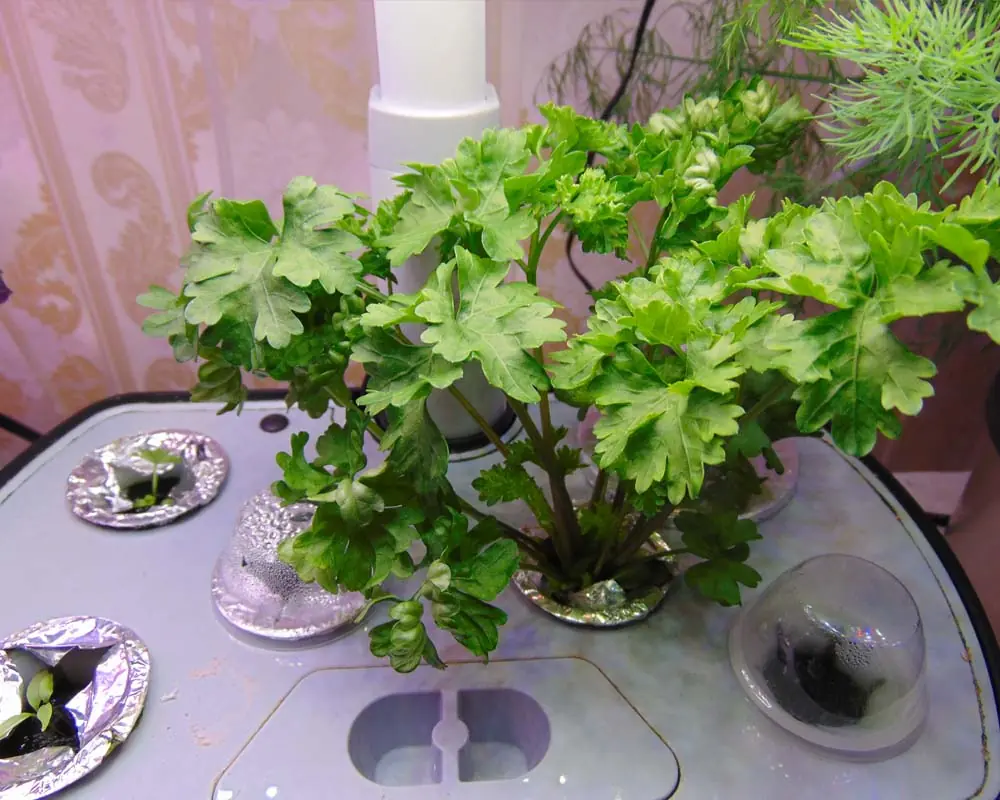
From this point on, the parsley took off rapidly, with noticeable changes tracking day by day. The root system was becoming increasingly branched, long, and bright white.
By Day 35, the parsley in the primary pot had grown substantially larger—enough that I couldn’t resist plucking a leaf to taste-test it. Meanwhile, the second batch of delayed seedlings was just beginning to establish themselves. This created a temporary structural imbalance in the garden that I had to manage.
Read more: Growing Basil in an AeroGarden Bounty: A Deep-Dive Case Study
Nutrient & Water Management
Throughout this entire growing cycle, I never performed a full reservoir change or deep clean; I strictly topped off the water. Once the parsley reached its maximum size, it became incredibly thirsty, requiring a top-off every other day.
- Watering: I used tap water pre-adjusted to a pH just below 6.0.
- pH Stability: I monitored the pH closely. If it drifted outside the 5.5–5.9 range, I corrected it immediately. Interestingly, about two weeks into the cycle, the bio-system stabilized entirely on its own at a steady 5.9.
- Fertilizers: After the initial setup doses, I managed feeding entirely by tracking the EC. Whenever the reading dipped below 1.5 mS/cm, I added a fresh dose of nutrients.
- Lighting: As the curly parsley grew taller, I progressively raised the hood, keeping a consistent 2-to-3-inch gap between the canopy and the LEDs.
Read more: Growing Oregon Spring Tomatoes in the AeroGarden Farm 12XL
Pruning & Harvesting
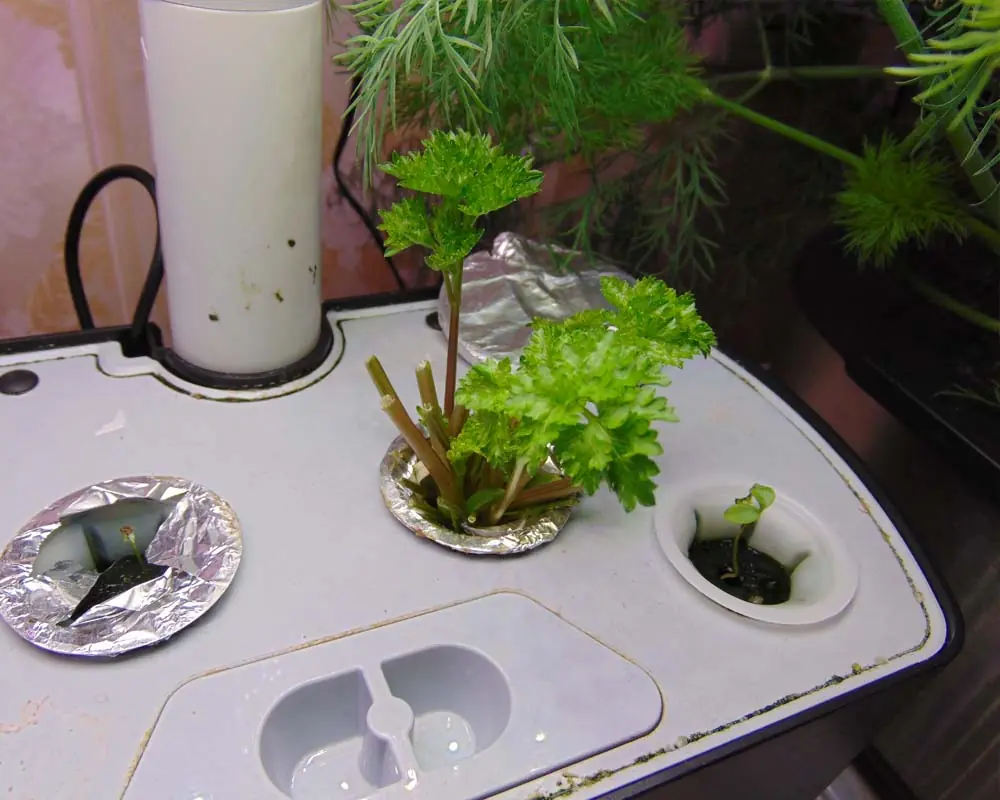
By Day 43, the parsley in the dominant first pot had grown so dense that it was completely shading out the second-wave seedlings. It was time for a major harvest.
Using sharp pruning shears, I carefully cut away the mature outer stems. These were the largest and oldest leaves on the plant. I left the smaller, younger stems in the center intact to keep the plant producing.
This heavy prune opened up the canopy, allowing the second batch of seedlings to finally get enough light to compete on equal footing. Within just a few days, a flush of new stems emerged from the center of the main pot, and the entire system recovered beautifully.
Read more: 6 Best Plants to Grow in AeroGarden Bounty
Overcoming Challenges
Aside from the initial uneven germination, this run was incredibly smooth.
Thanks to the supplemental air stone, the root mass stayed pristine, white, and completely free of root rot. I also set up a small oscillating fan on a timer to keep air moving around my indoor setups, which successfully prevented any powdery mildew or fungal issues on the dense foliage.
Even though the roots grew massive and filled out the tiny tank, they never interfered with the AeroGarden’s built-in pump or water-level sensor.
Read more: 7 Common AeroGarden Problems (And How to Fix Them Fast)
Final Yield (Days 50–70)
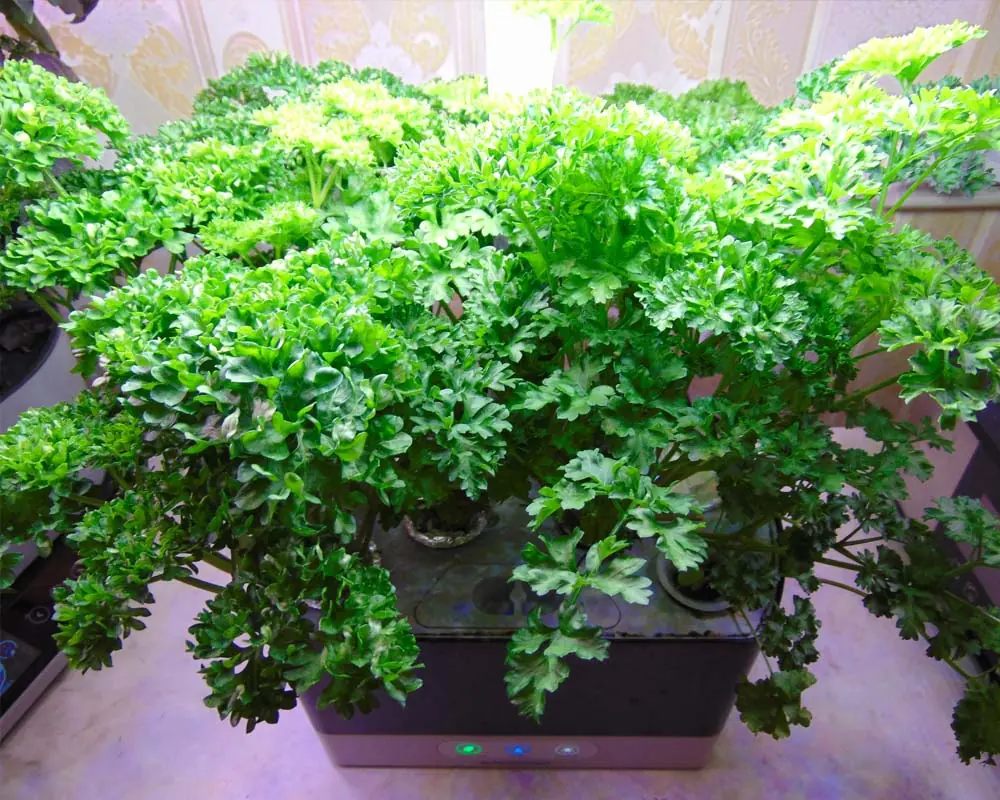
It took a total of 70 days to achieve the peak results shown in the photos. However, if all four pods had germinated at the exact same time, I easily could have hit this volume by Day 50.
Ultimately, I ended up with two massive, dense bushes of curly parsley in the Harvest system. By harvesting continuously over the course of a month, I walked away with 4 large, commercial-sized bunches of fresh parsley.
Costs vs. Results
|
Item |
Quantity |
Cost |
|---|---|---|
|
Electricity |
30 kWh |
$5.10 |
|
Substrates |
4 Sponges |
$2.00 |
|
Nutrients |
38 mL total (FloraSeries) |
$0.38 |
|
Water & Additives |
Tap water, pH-Down |
$0.20 |
|
Total Cost |
$7.68 |
In the end, producing those 4 massive bunches cost a total of $7.68, breaking down to roughly $1.92 per bunch.
What do you think? Is a massive bunch of homegrown, pesticide-free curly parsley worth two dollars? Let me know your thoughts in the comments below!
Share This Post